Simple Guidelines for Book Design
A few simple guidelines followed while designing a book will ensure that it is printed beautifully, in accordance with production standards. Design your books any way you choose, however, it is important to keep these few basic design guidelines in mind before you begin.
Follow these 3 simple steps to help you design your book:
- Trim Zone & Safe Zone
- Bleeding of Images
- Image Selection
Trim Zone & Safe Zone
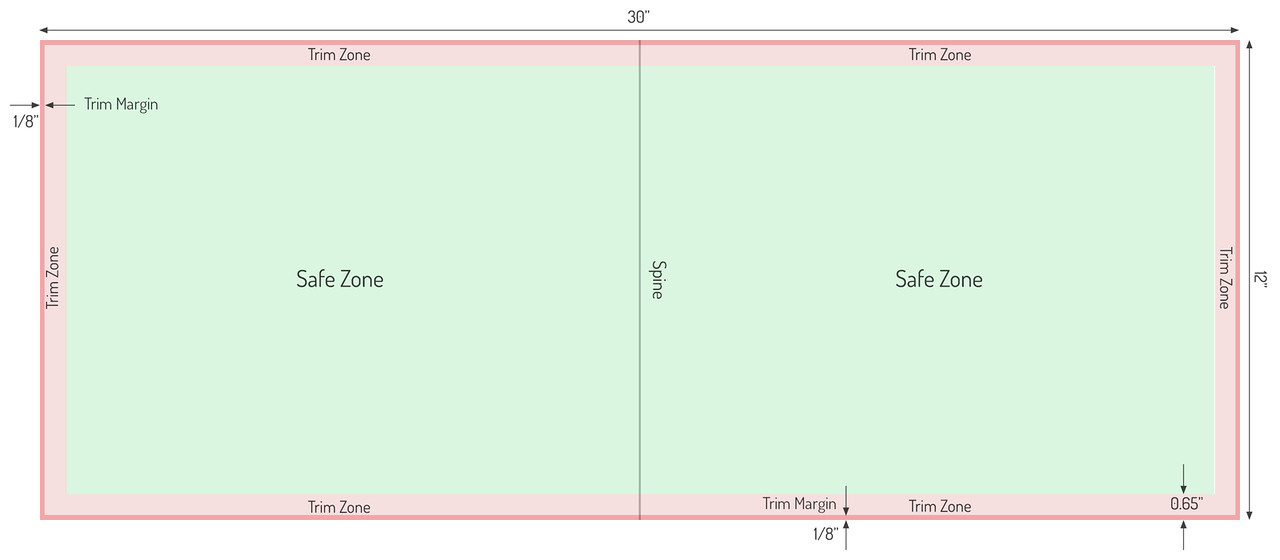
The area of the spread or layout that gets cut off after printing is technically referred to as the Trim Zone. It is the region around the periphery of the spread or layout as highlighted in the picture below in red.
Placing images in the Safe Zone will ensure that the images are not trimmed. Sometimes the print labs trim slightly more than the indicated trim line and therefore it is advised that all important details of the image stay within the Safe Zone.
The Spine is the line or fold passing through the centre of the spread or layout.
Figure 1: Shows the various Trim Zone, Trim Margin, Spine and Safe Zone for a 12”x 15” layout.
The Trim Zone is fixed at 0.65”. The Trim Margin at ⅛” is a part of the Trim Zone at the edge of the layout, which will get trimmed out during book production.
The spacing for Trim Zone and Trim Margin can usually be accounted in most of the popular book design softwares.
Bleeding of Images
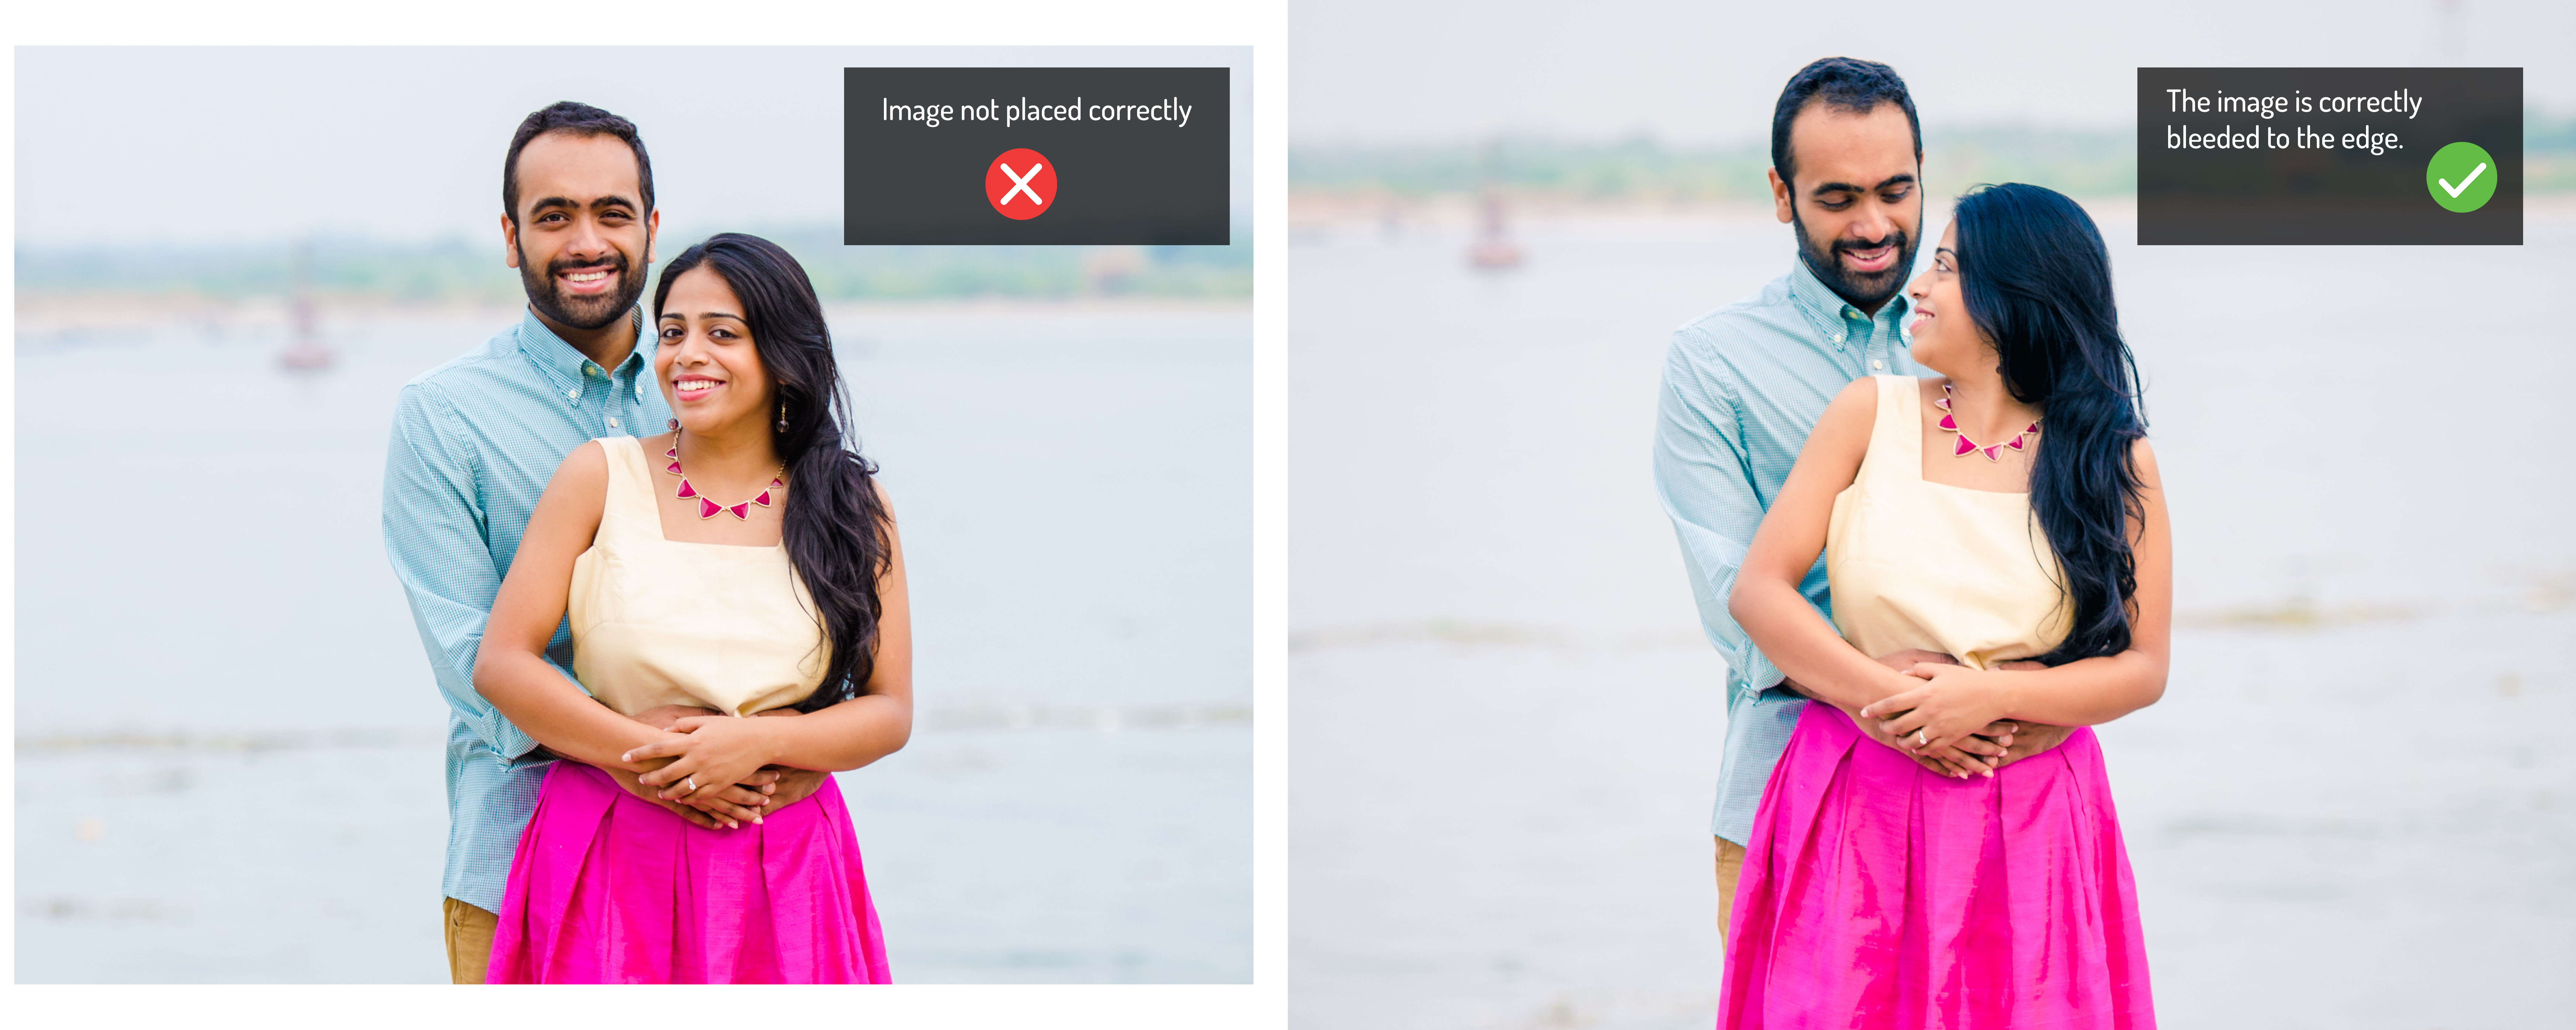
Bleeding of images or full bleed images are images that go all the way to the edge of the spread. While designing, the various cases outlined below have to be addressed so no important part of the layout is lost during book production:
- Ensure that no critical part of the image is in the Trim Zone as shown in Figure 2.
Figure 2: Shows a simple design change to prevent trimming of critical image areas.
- The image is to be bleeded completely from edge to edge as shown in Figure 3.
Figure 3: Shows the correct way to bleed images right till the edge of the layout.
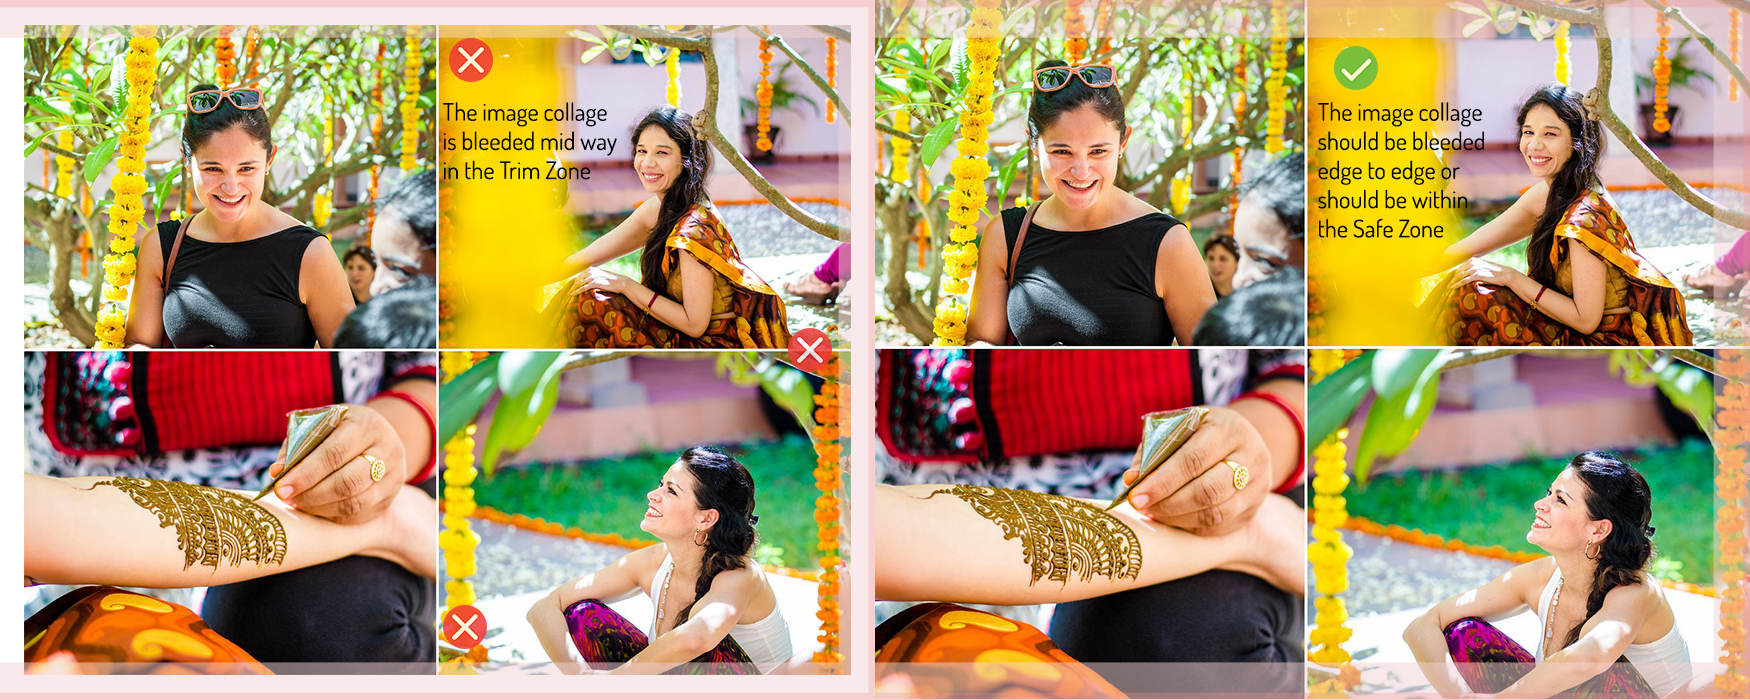
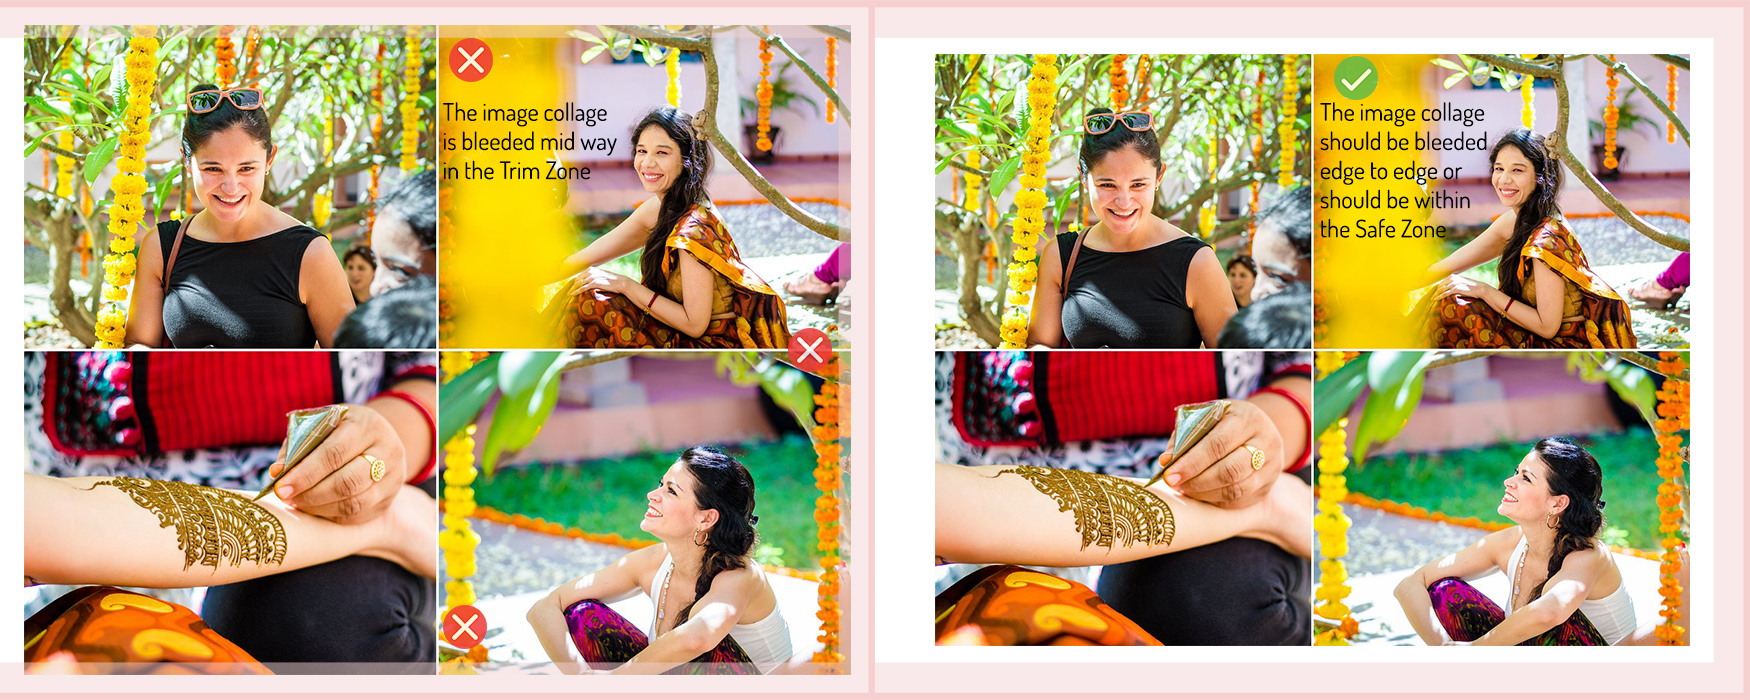
- An image collage has to bleed either from edge to edge or should be placed within the Safe Zone as shown in Figure 4 and 5 respectively.
Figure 4: Shows the correct method to bleed an image collage from edge to edge.
Figure 5: The image collage is to be placed within the Safe Zone if it’s not bleeded.
Bleeding of Images across Spine
A little care has to be taken when bleeding images across the spine of the Book. The Digital Offset series of books have a thin gutter line of 0.4 mm along the Spine. This gutter line causes a slight discontinuity in the images that are bleeded across the spine during book binding.
The Flushmount series of books are not subjected to this limitation as the entire layout is one continuous print. The spine in this case is just a scoring mark in the middle of the layout.
A few simple cases have been outlined below:
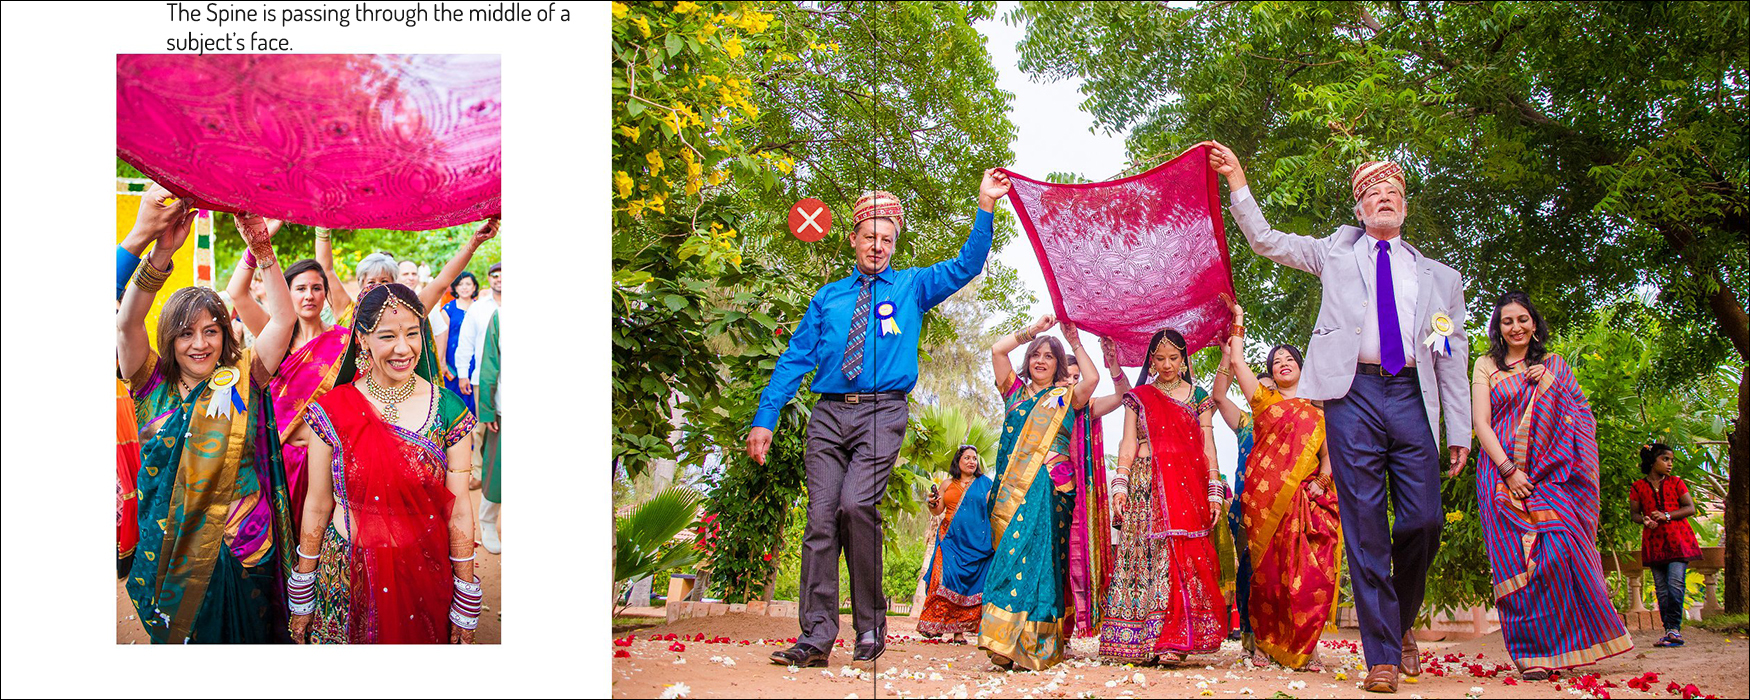
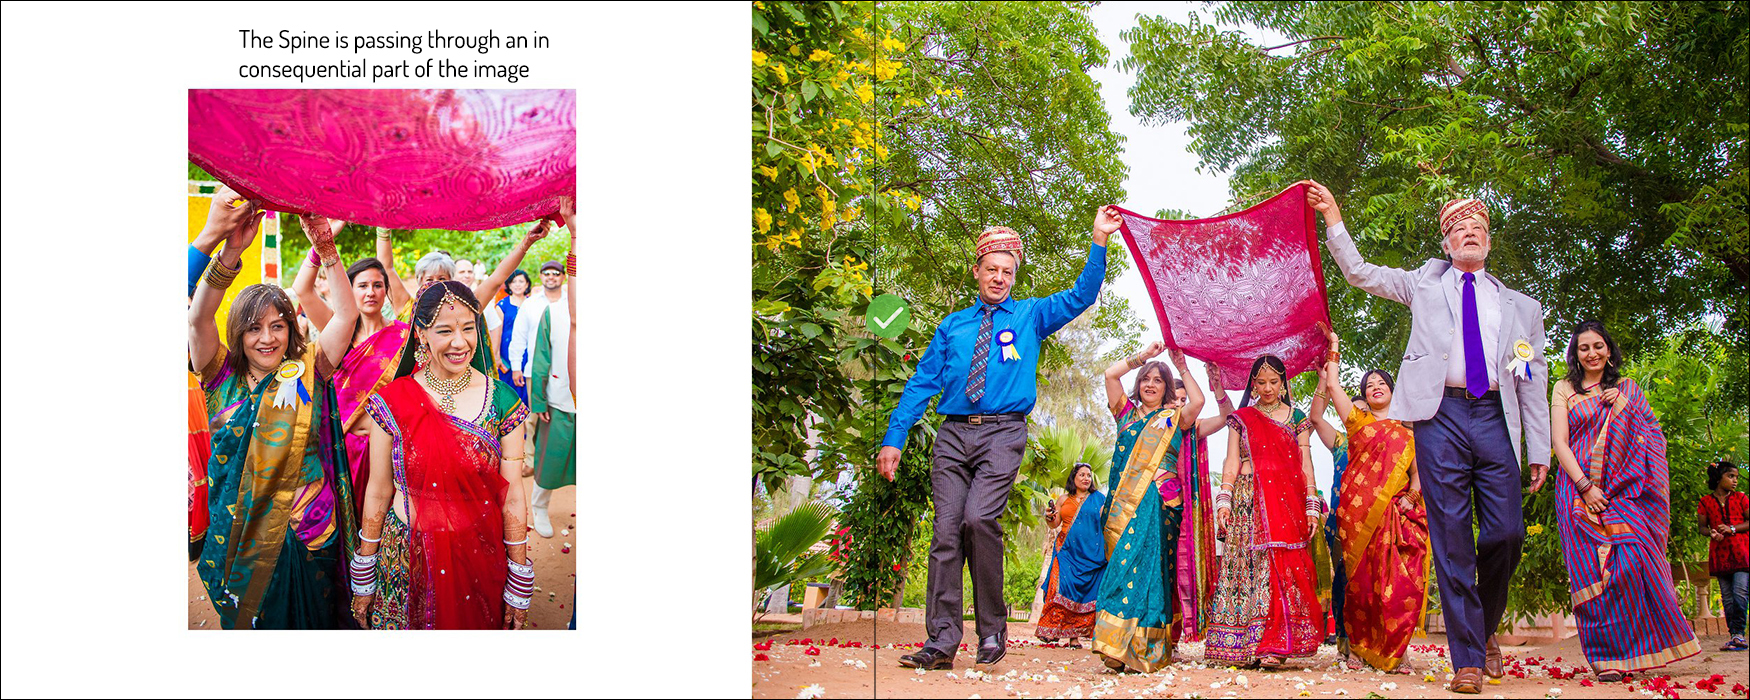
- Avoid passing the spine through a person or a person’s face as shown in Figure 6. Aim to design such that the spine passes through an inconsequential part of an image as shown in Figure 7.
Figure 4: Avoid passing spine through people.
Figure 7: The spine can pass through an inconsequential part of the image.
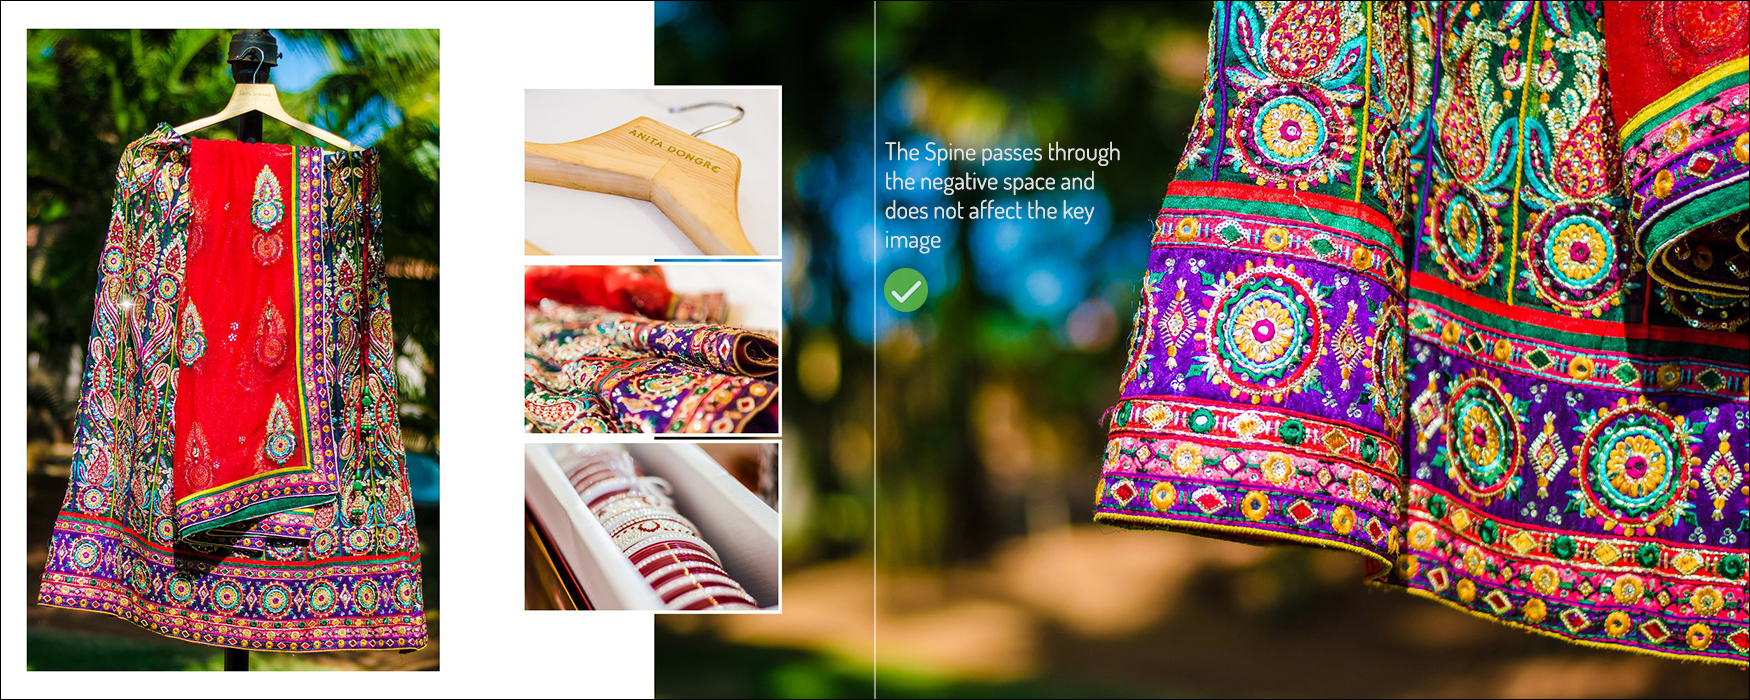
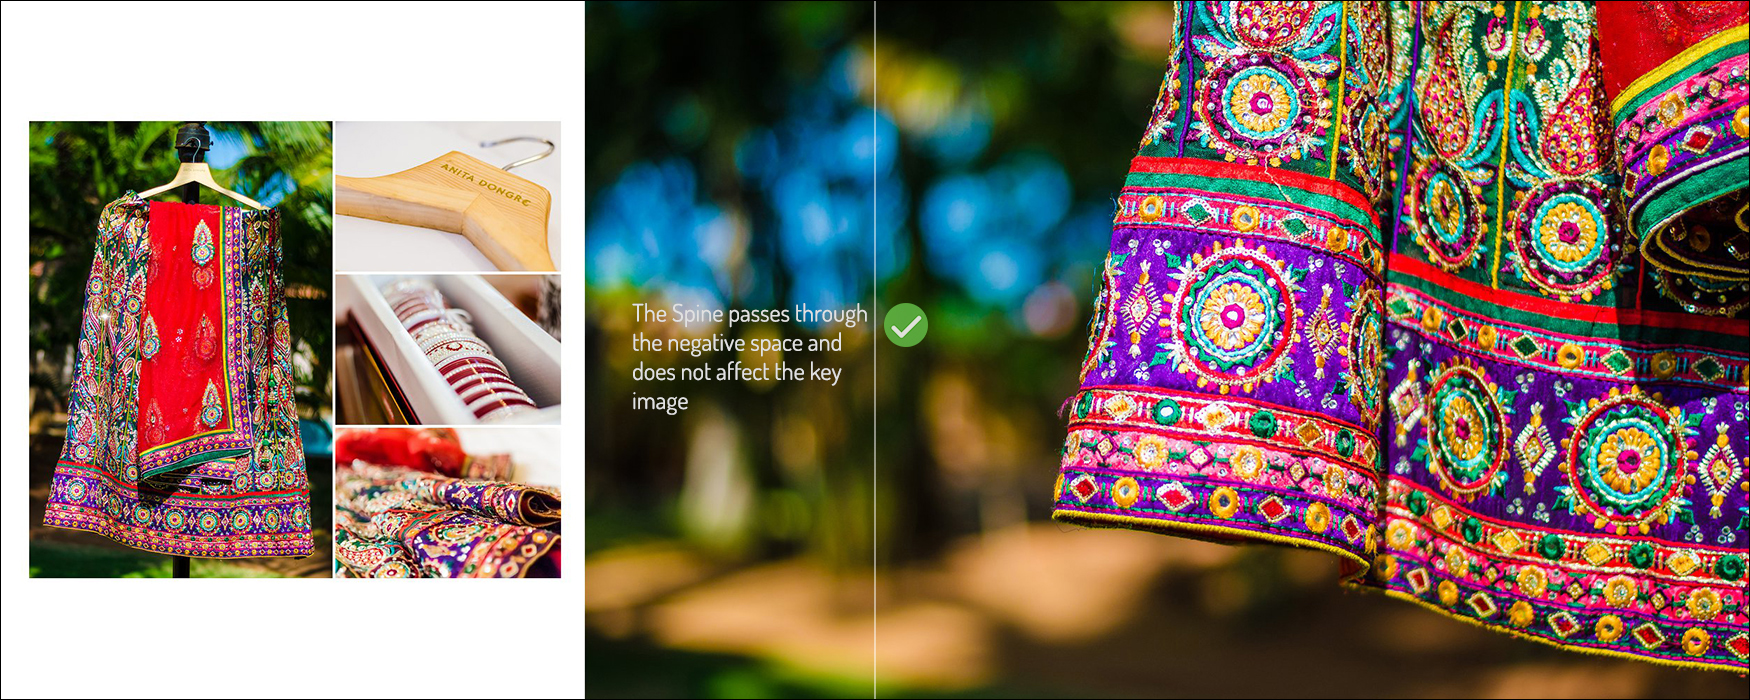
Avoid passing the spine through the primary subject of an image. Also ensure that the spine is not passing through subjects with a high slope or diagonal line elements. This causes an abrupt image discontinuity round the spine when the book is bound. This is shown in Figures 8. Alternative design options are shown in Figure 9 and 10 respectively.
Figure 8: The spine is passing through an element of high slope.
Figure 9: An alternative design option allowing the Spine to pass through negative space.
Figure 10: A second alternative which avoids the Spine passing through the primary subject.
Image Selection for Book Cover
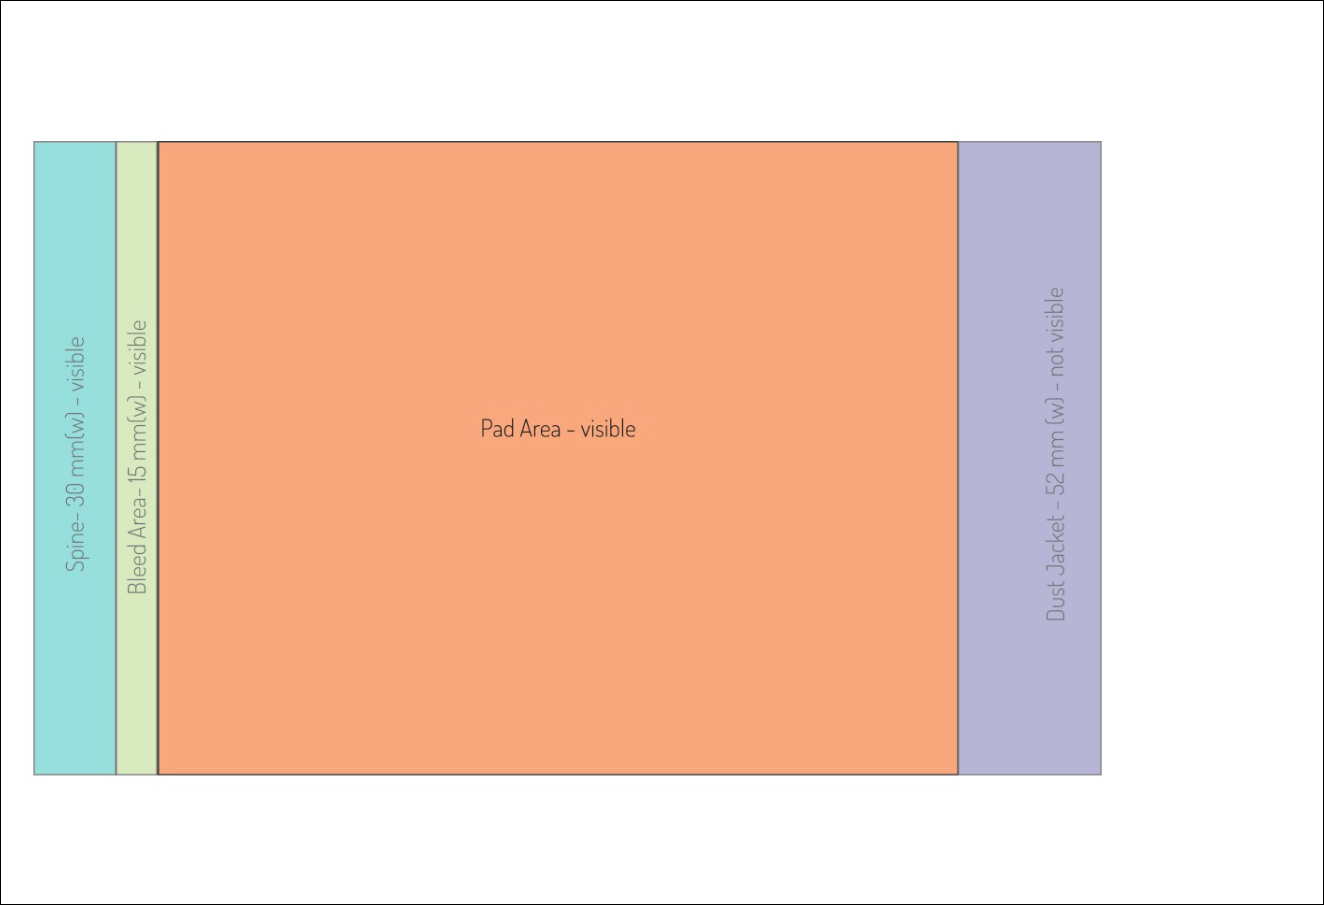
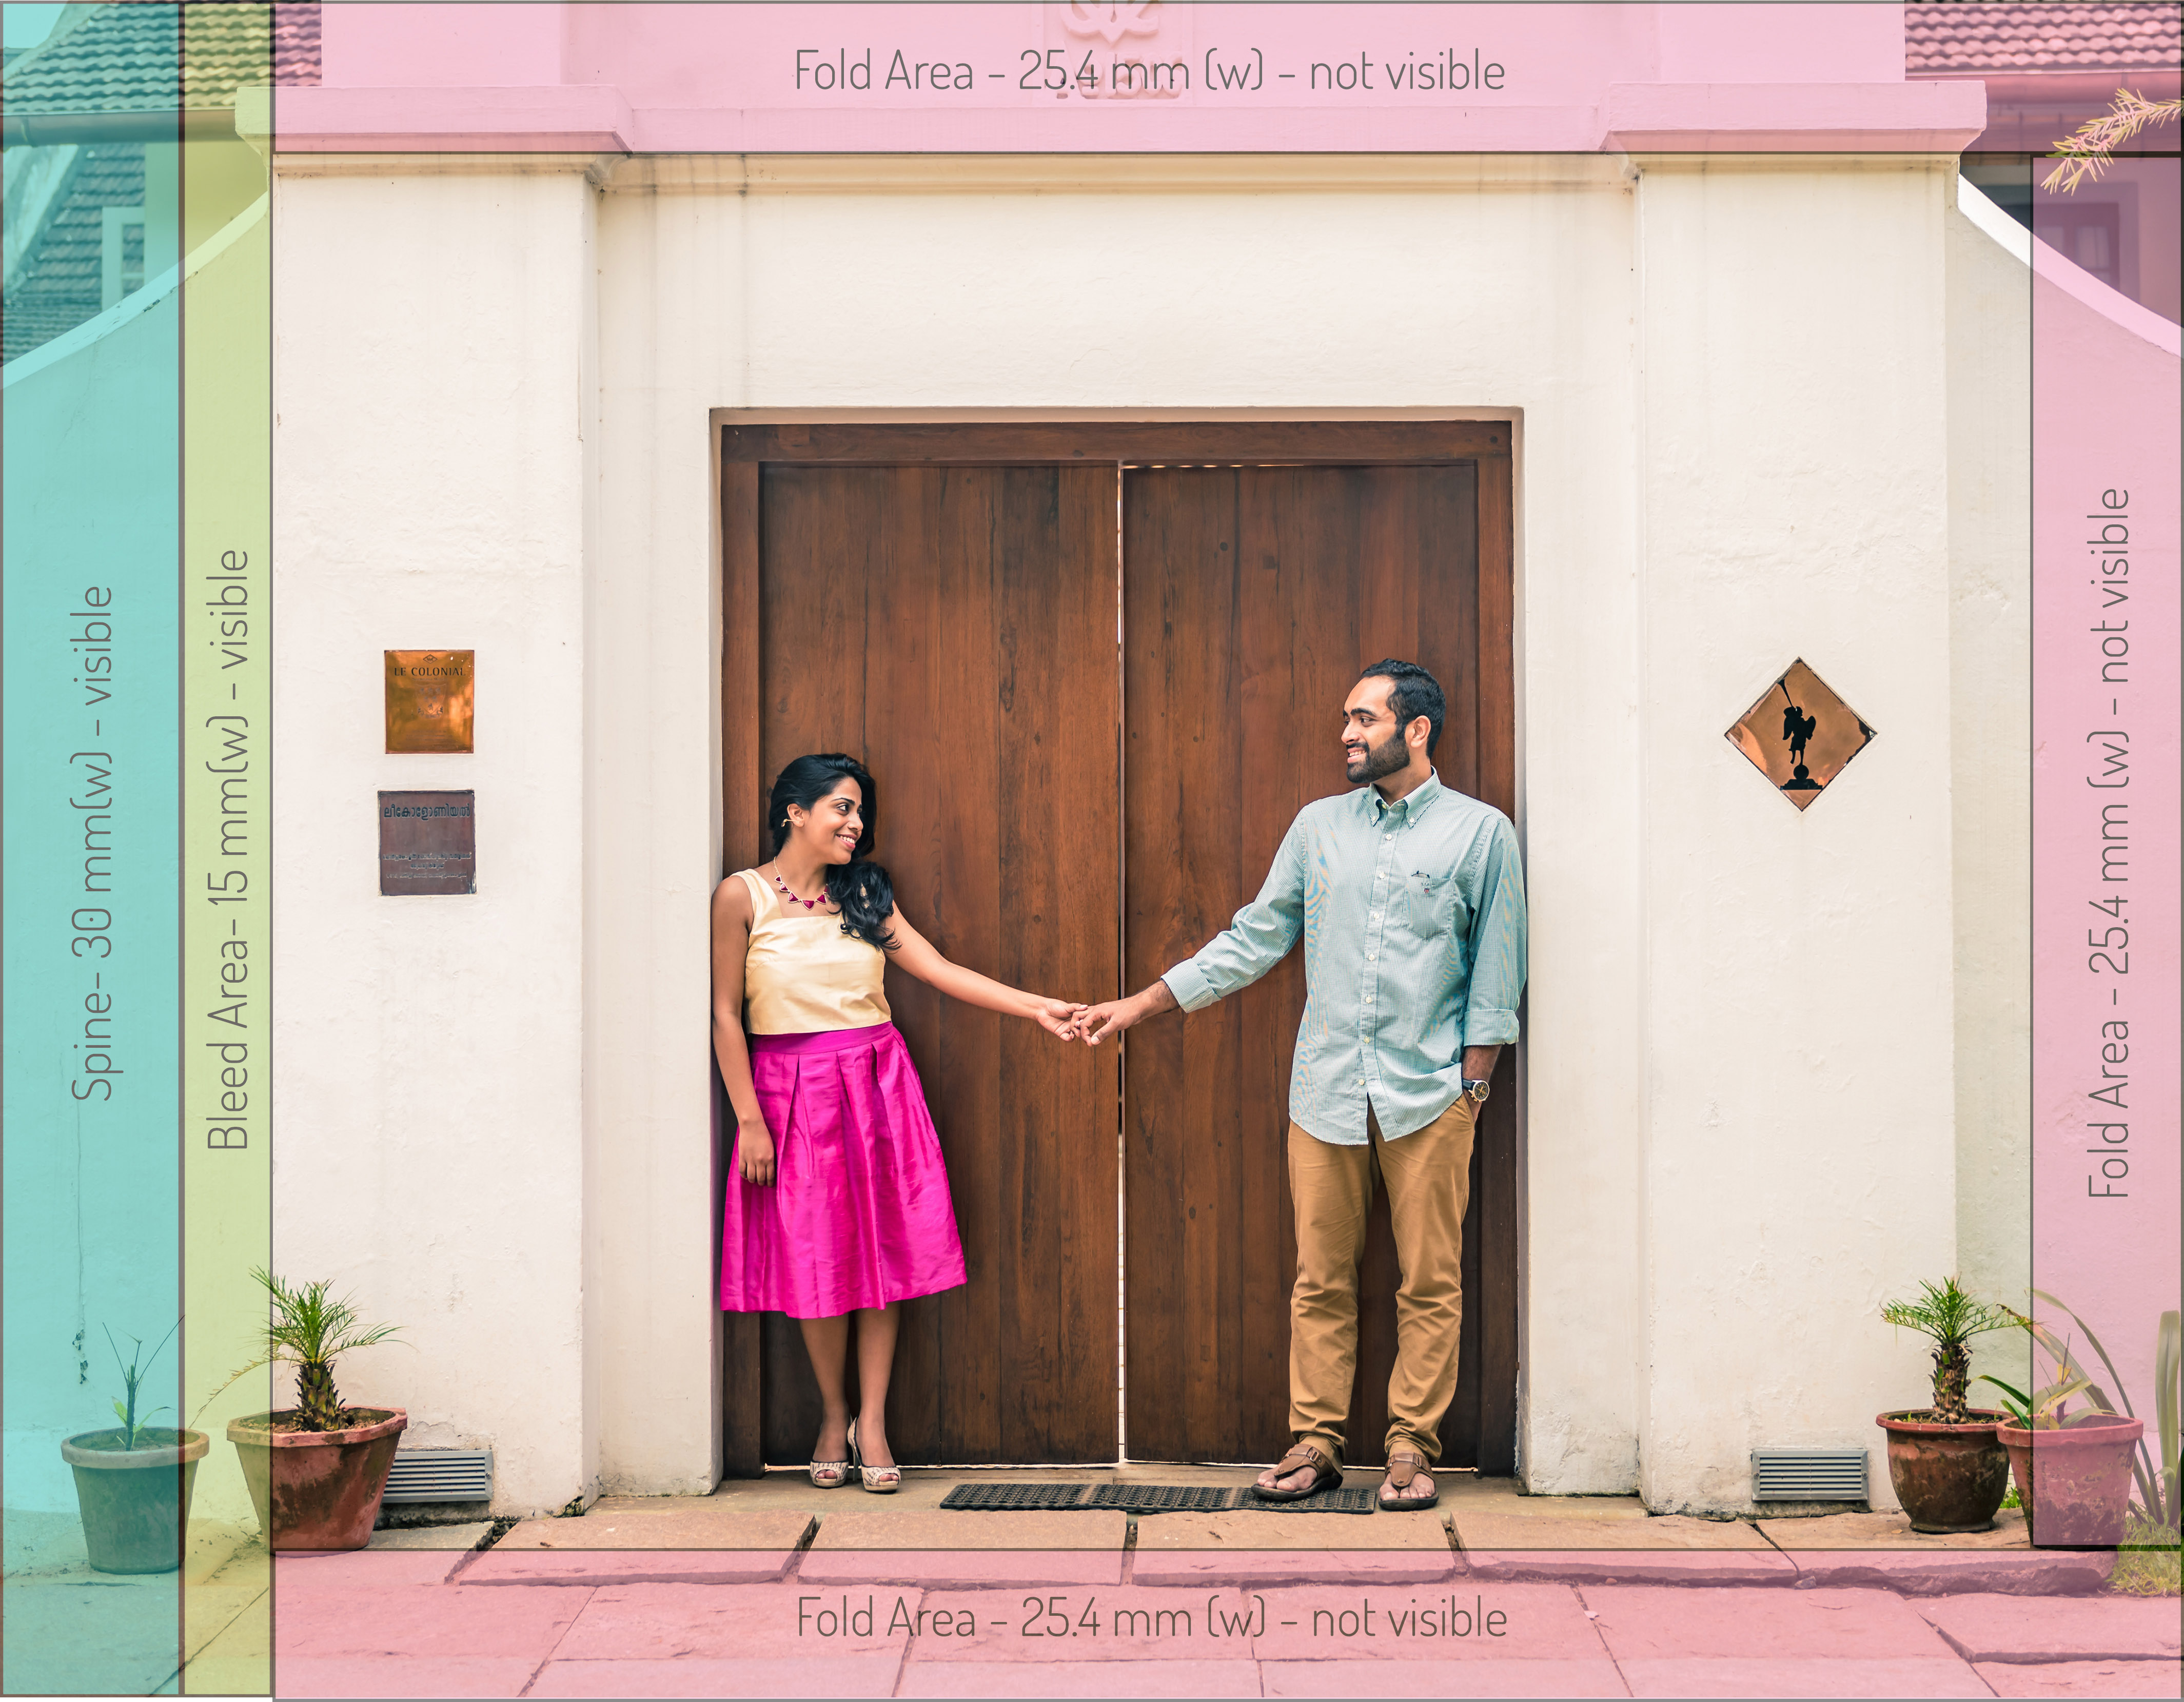
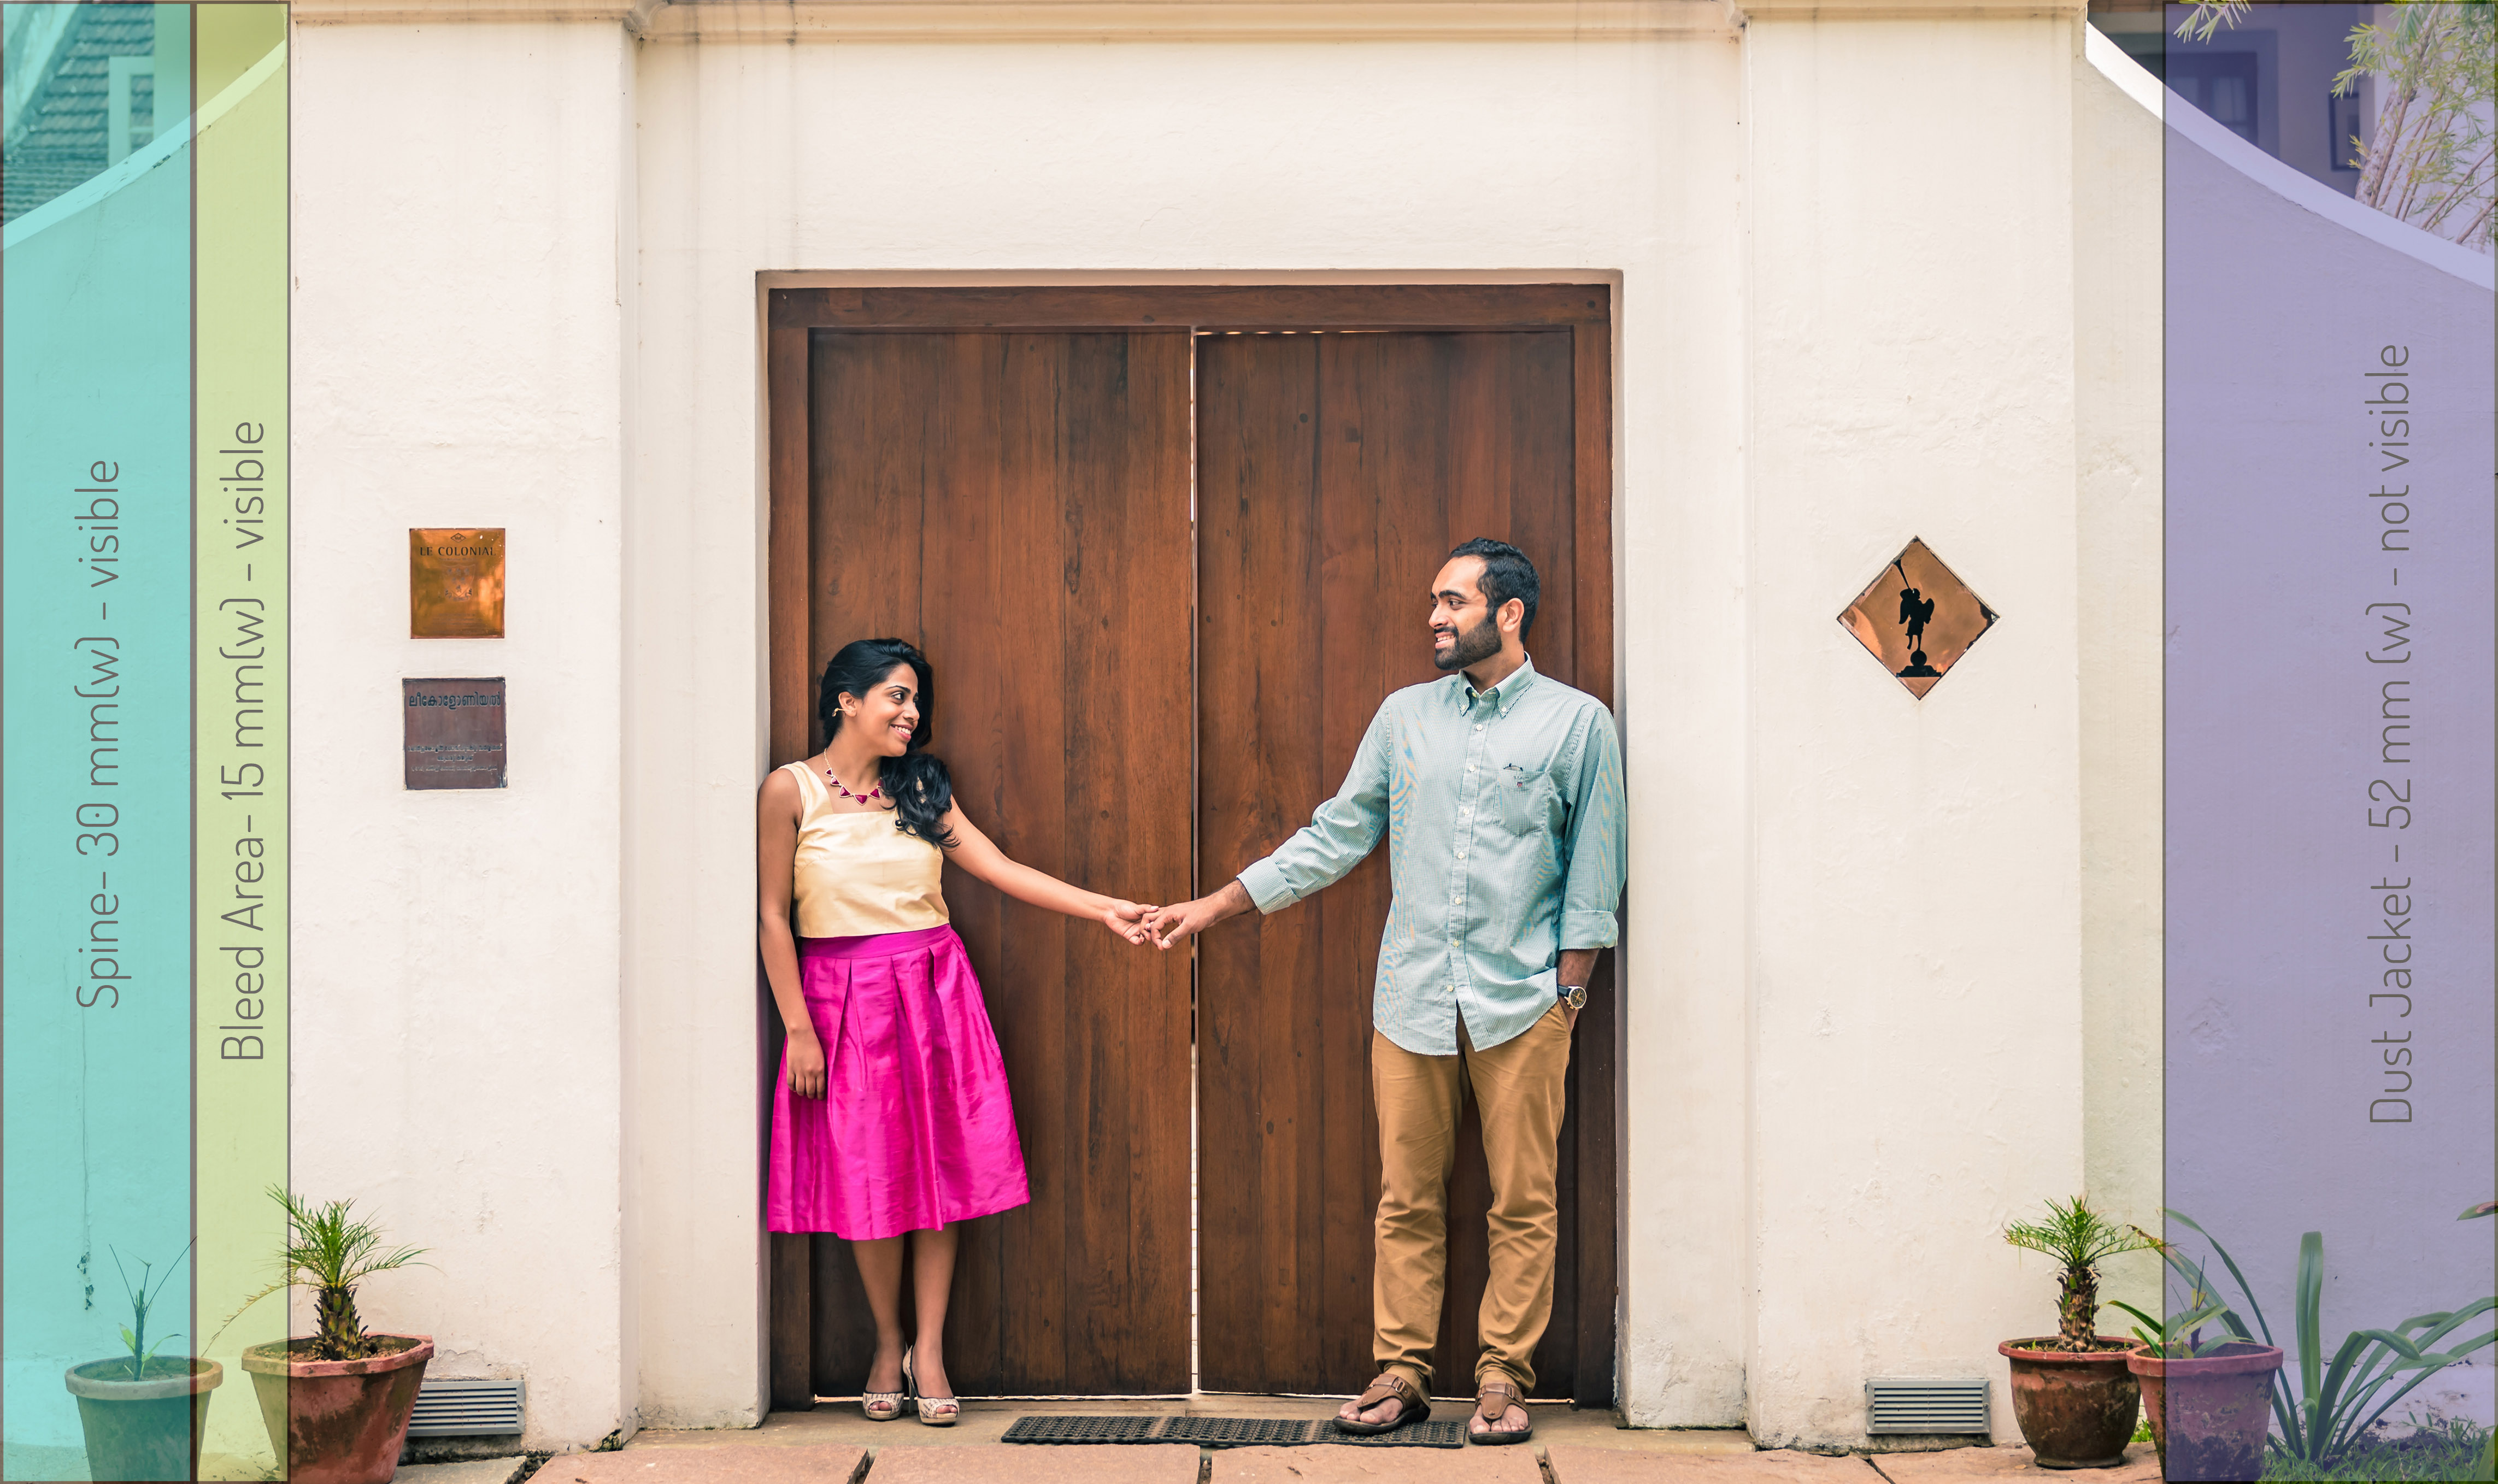
Signature Books are offered in Hardcover ImageWrap. The selection of the image for the Book Cover is important and has to be taken into consideration various bleed areas required for making the Cover. The various aspects of the Book Cover & Dust Jacket are shown in Figure 11 and 12 respectively.
Figure 11: Shows the various sections of the Book Cover.
Figure 12: Shows the various sections of a Dust Jacket.
The image selected for the Hardcover ImageWrap should have sufficient negative space (non-critical areas of the image) around the primary subjects to account for the additional sections.
Figure 13: Shows two image choices for the Book Cover with their Pros & Cons mentioned:
Figure 13: Shows the pros and cons of two images selected for the Book Cover.
Figures 14 and 15 show an appropriate image selected for the Book Cover, which accounts for the additional areas required for production.
Figure 14: Shows an image which accounts for the additional areas for the Book Cover.
Figure 15: Shows the image completely covering the flap of the Dust Jacket.

